Download container images
You can download a large range of container images by visiting NVIDIA GPU Cloud (NGC) and check whether NVIDIA provides a container image with the application you need.

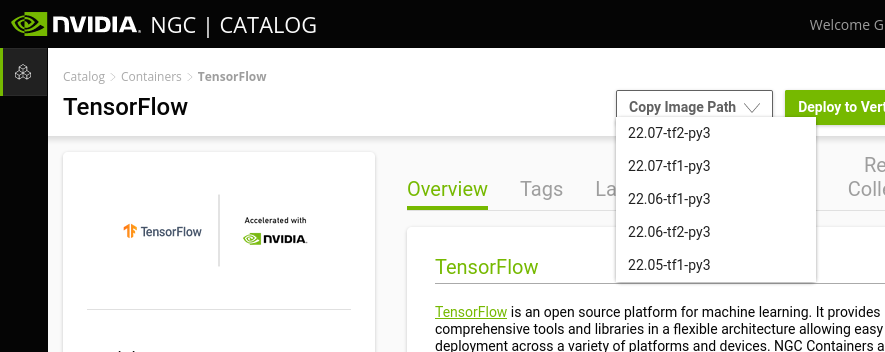
As an example, this could be TensorFlow. You can search on NGC and find TensorFlow. Here you can choose the desired version from the "Copy image path" dropdown menu:

This copies a link to the container image which we will use in the following example.
We need to use Singularity to download the container image and in order to run Singularity, we must run it through the Slurm queueing system using the command srun.
To download the container image to your directory paste the url to the container image like so:
srun --mem 40G singularity pull docker://nvcr.io/nvidia/tensorflow:24.03-tf2-py3
NOTE: The container image could take ~20 minutes to download.
The above example consists of the following parts:
srun: the Slurm command which gets the following command executed on a compute node.mem: a Slurm command that allows you allocate memory to your process, in this case 40GB of memory. A higher amount of memory than the default is needed specifically for this TensorFlow container image. Please see the Work-around for memory-consuming downloads section at the bottom of the page for a better way to avoid excessive memory requirements.singularity pull: the Singularity command which downloads a specified container image.docker://nvcr.io/nvidia/tensorflow:24.03-tf2-py3: this part of the command itself consists of two parts.docker://tells Singularity that we are downloading a Docker container image and Singularity automatically converts this to a Singularity container image upon download.nvcr.io/nvidia/tensorflow:24.03-tf2-py3is the container image label copied from the NGC webpage which identifies the particular container image and version that we want.
Once the singularity pull command has completed, you should have a file called tensorflow_24.03-tf2-py3.sif in your user directory (use the command ls to see the files in your current directory).
Work-around for memory-consuming downloads
Downloading some Singularity container images may require a large amount of memory to succeed, such as:
srun singularity pull docker://nvcr.io/nvidia/tensorflow:23.03-tf1-py3
If you simply run this command as-is, you are likely to experience an out-of-memory error during build of the container image. A work-around for this issue is to simply allocate more memory to your job using the --mem option for srun (it could easily require 40-50GB). This may cause your job to have to wait for a long time before it can start.
There is, however, a better way to run Singularity to avoid the unreasonable memory requirement. Please follow these steps to use the /tmp partition of a compute node during build of your container image:
-
Start an interactive job for building your container image:
(You may add thesrun --pty bash -l--nodelistparameter to request a particular compute node as usual withsrun.) -
Create a temporary directory for yourself to use during build of your container image:
Take note of the back-tick characters in the above command; this is just to create a directory calledmkdir /tmp/`whoami`/tmp/usernameif your username isusername. You can call it something else instead, but it is important to create it under/tmp. -
Run Singularity to build your container image, using your new directory in
/tmpfor temporary data storage:
TheSINGULARITY_TMPDIR=/tmp/`whoami` singularity pull docker://nvcr.io/nvidia/tensorflow:23.03-tf1-py3SINGULARITY_TMPDIRvariable should be set to whatever you named your temporary directory in step 2. -
After Singularity has finished building, delete your temporary directory:
rm -r /tmp/`whoami` -
Exit your interactive job:
exit